
")
How to Install a Heavy Duty Military-Style Case (Step-by-Step Guide)
Posted by New Case on 29th May 2025
Heavy Duty Military-Style Case are built tough to offer superior protection — but their rugged construction can make installation a bit tricky if you haven’t used one before. This guide walks you through how to correctly install and remove your heavy-duty case without damaging your phone or the case itself.
✅ What You’ll Need:
-
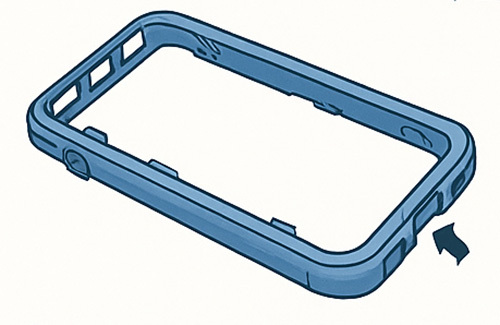
Your Heavy Duty Military-Style Case (including all parts)
-
Your phone (fully powered off is recommended)
-
Optional: Microfiber cloth for cleaning
Step-by-Step Installation Guide
Step 1: Disassemble the Case

Most heavy duty style cases are multi-layered, often consisting of:
-
An inner hard plastic shell (two pieces that snap together around the phone)
-
An outer rubber or silicone skin that wraps around the shell
To begin disassembly, gently lift the flap covering the charging port. This creates a gap to help you start peeling away the outer rubber layer without forcing it. Once the flap is open, gently pull backward from that edge — the silicone shell will begin to loosen from the plastic frame.
With the port flap loosened, continue by gently peeling the rubber skin corner by corner. Work your way around the phone until the entire silicone outer layer is removed. Take care not to overstretch or tear the material.
Step 2: Separate the Inner Shell
The hard shell usually has clips around the edges.
-
Look for tabs or small notches where the case halves join.
-
Carefully unclip the two plastic pieces by pulling them apart evenly.
⚠️ Take your time—forcing it can crack the plastic.
Step 3: Clean Your Phone (Optional but Recommended)

Use a microfiber cloth to wipe the screen and back of your phone to remove dust or fingerprints before sealing it in.
Step 4: Place Your Phone in the Shell

-
Insert the phone into the bottom half of the plastic shell.
-
Snap the top half over it so it fits securely.
Ensure all clips snap shut and there are no gaps around the edges.
Step 5: Reapply the Rubber Outer Layer

-
Align the rubber skin around the corners first.
-
Work your way around, pressing it into place along all edges and ports.
Make sure it sits snugly and that all cut-outs (for camera, charging port, etc.) align correctly.
✅ That’s it — your phone is now ready for action.
Tips for Easier Use
-
Screen Protector Compatibility: Heavy Duty cases usually work best with thin tempered glass protectors, as thicker ones may cause lifting.
-
Removing the Case: To remove, reverse the steps—start by peeling off the rubber, then gently unclip the plastic shell.
-
Cleaning: Occasionally remove the case to clean inside and prevent dust build-up.
Still Having Trouble?
If you’re unsure or something doesn’t feel right, don’t force the case. Reach out to us via our contact page and we’ll be happy to help with installation advice or photos.