

How to Test a Waterproof Phone Case Before Use
Posted by New Case on 2nd Jan 2026
Australia’s beaches, pools, and unpredictable weather mean protecting smartphones from water is a common concern. A waterproof phone case can offer peace of mind, but it’s important to verify that it really works before trusting it with your device. Here’s how to properly test a waterproof phone case at home and ensure your phone stays dry.
Why Test Your Waterproof Phone Case?
Even if the packaging states a certain water resistance level, there’s always a chance of manufacturing defects, worn seals, or hidden issues. Testing your waterproof phone case before use can help prevent costly damage in real-world situations—whether you’re kayaking, hiking in the rain, or spending a day at Bondi Beach.
Setting Up for a Leak Test
Before you get started, make sure your case is clean and the seals are free from sand, dust, or lint. This helps ensure a secure closure. Waterproof case preparation is simple but essential:
- Wipe down the inside and outside of the case
- Inspect the silicone gasket and all closing mechanisms
- Assemble the case according to manufacturer instructions
Never skip this step, as even a tiny bit of dirt can break the waterproof seal and cause a leak.
What You Need for Testing
You don’t need fancy equipment to test a waterproof phone case. Grab these household items:
- Paper towel or dry tissue
- Sink, bowl, or bucket of water
- Something weighted (like a spoon)
- Your assembled waterproof case (empty)
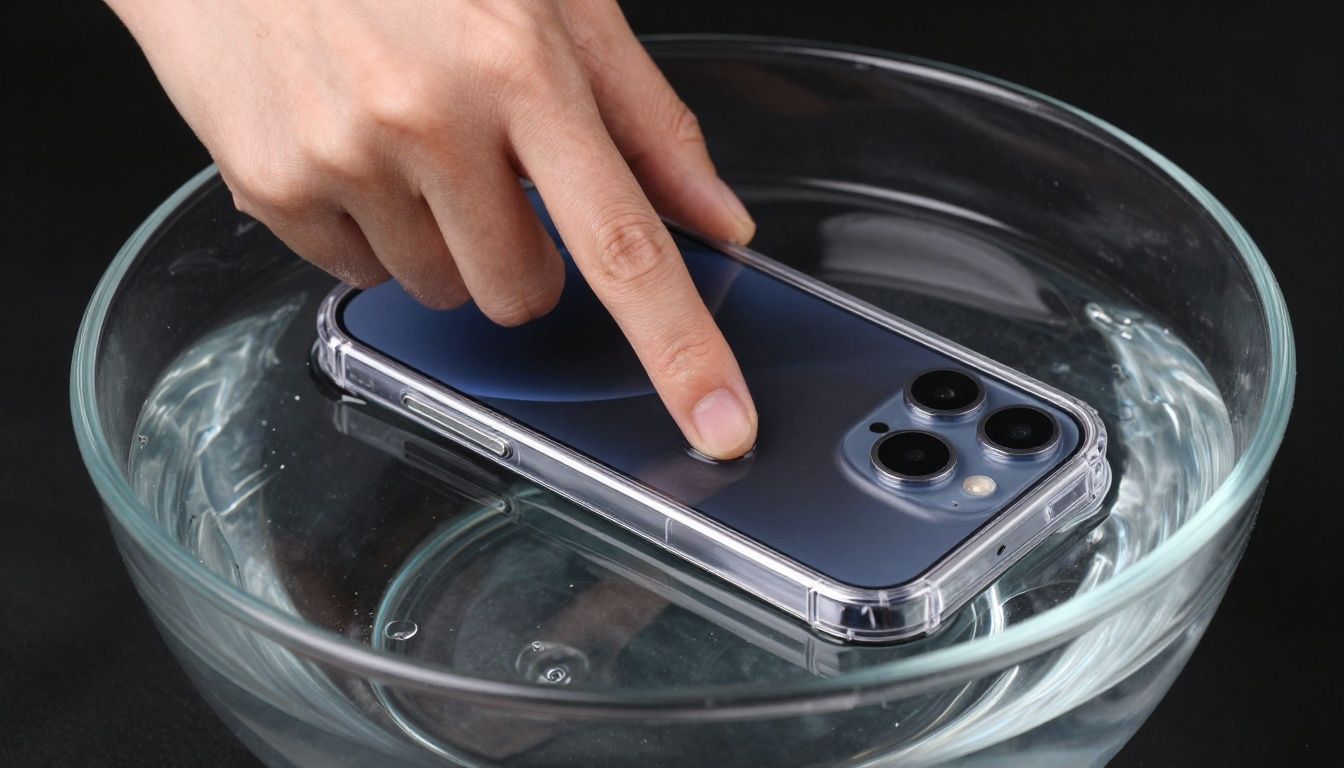
Step-by-Step: How to Test Waterproof Phone Case
1. The Tissue Test
Place a dry tissue or paper towel inside the empty, closed case. Make sure it sits evenly, without blocking the seals. The tissue will reveal any leaks that may occur.
2. Submerge and Wait
Fully submerge the case (with the tissue inside) in a bowl or sink filled with water. Loosely weight it down to keep it underwater. Leave it submerged for at least 15 minutes, or longer if you plan extended use in water.
3. Remove and Inspect
Take the case out, dry the exterior, and carefully open it. Check the tissue for any signs of moisture. A perfectly dry tissue means the case passed the waterproof case leak test; any dampness suggests a compromised seal.
Understanding IP Ratings and Labelling
Manufacturers often provide an IP (Ingress Protection) rating, like IP68, to indicate water resistance. While these ratings are useful, they are tested in controlled environments and may not reflect real-life use.
If you want to do an informal IP rating test at home, consider:
- Mimicking the depth and duration stated on the packaging
- Being realistic about conditions (saltwater, pressure, debris)
Remember, repeated use (especially with sand or salt buildup) may reduce effectiveness over time.
Preparing Before Each Use
Even if your case passed the initial test, recheck the seals and perform a quick dry tissue test occasionally—especially after dropping, bumping, or cleaning the case. This habit can help you avoid accidental water damage.
Frequently Asked Questions
Can I test my waterproof phone case with my actual phone inside?
It’s safest to test with a dry tissue or paper towel. This way, you avoid risking your phone if the case isn’t properly sealed.
How often should I re-test my waterproof case?
Whenever the case is dropped, exposed to sand or salt, or before any important water activity. A quick test before each major use is a smart habit.
What if my case fails the leak test?
Do not use it with your device. Check for debris on the gasket or consider replacing the case, as a failed test indicates possible flaws in the seal.
Practical takeaway
Testing your waterproof phone case before use adds an extra layer of security for your device. A simple home test with a tissue and water can save you from serious headaches when you’re near water—giving you confidence your phone is protected in Australia’s wettest conditions.